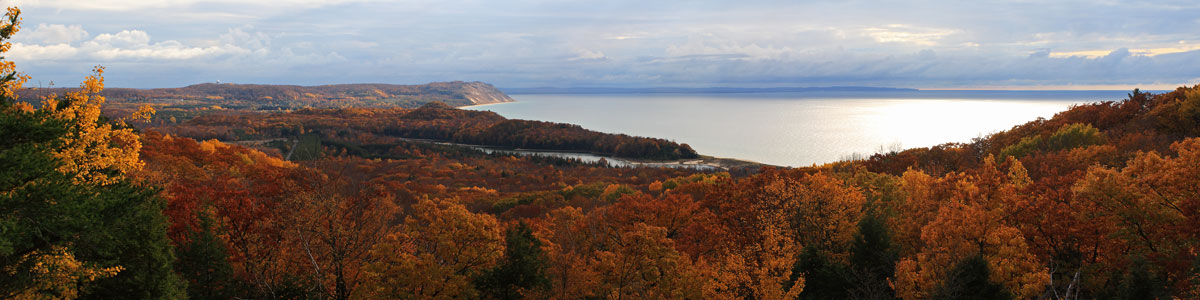
A few years ago a friend from work invited me along on a winter camping trip. I had read about winter camping and always wanted to try it, but up until then I didn’t have anyone to go with. Most people think we are crazy and will not even consider trying it. However, if you are well prepared and have the right gear it can be a really good time. For us it has become an annual event that I am always looking forward to.
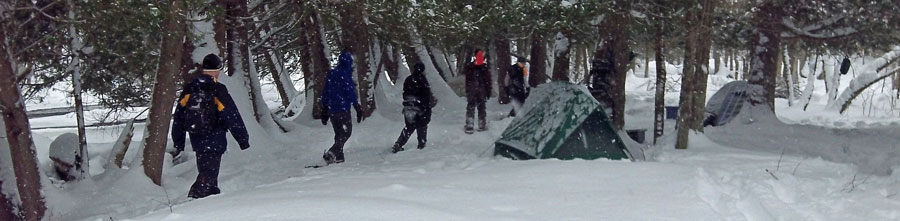
Below is a list of what I take winter camping and a few tips that I have learned from our trips.
I included links to many of the items on Amazon if you are interested in learning more.
1. Gear Sled –
The nice thing about camping in the snow is that you can use a sled to haul your gear instead carrying it all on your back. This allows you to pack plenty of warm things without having to worry too much about the extra weight. I use the Emsco Heavy Duty Expedition Sled which is 66 inches long and has plenty of holes to use for tie downs. Another good option that a couple guys have is the Shappell Jet Sled.
This sled is mainly used by ice fisherman and has nice high sides and seems to be a little more rugged than the other options.

The first year I used dry bags for my clothes and then warped everything else in a tarp. The next year my friend had the idea of using plastic storage totes and we have doing this ever since. They keep everything nice and dry and are easier to pack and unpack. To pull the sled I put the rope above the hip belt of my back pack and then let it pull against the internal frame. I also run the rope through PVC pipe to keep the sled from sliding into the back of my legs on hills.
2. Snowshoes– Even when the snow is not real deep it is nice to use snowshoes because of the extra traction they provide. I use an old pair of Tubbs that I
have had for several years. Most guys are now using the MSR snowshoes
that have traction rails on the outside as well as the typical under foot claws. You can also buy 6-Inch tail extensions that can be removed to customize the float depending on the snow pack. Cross county skies can also be used, but it is more difficult to navigate tight trails and climb steep hills.
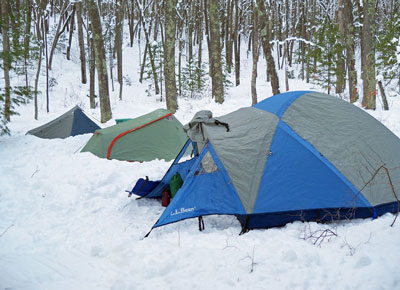 3. Tent – For winter camping I use a 3 season dome tent that we bought from LL Bean several years ago. It has a pretty heavy duty rain fly with almost full coverage. This was the tent that we used for kayak camping before we had kids and it is much heavier than my single wall backpacking tent and takes a little longer to setup. I like to have the tent and rain fly combination because it is actually surprising how much heat stays trapped inside the double wall tent. I can keep my water bottle next to me just outside of the sleeping bag and it usually will not freeze even when temperatures drop down to the single digits. Although, I think you would be fine in a lightweight backpacking tent except for in really heavy and wet snow. One of the guys used only his rain fly and ground cloth and then built a wall of snow around the outside and he was fine.
Before setting up the tent I either dig down to the ground or pack the snow down with my snowshoes. Both ways seem to work fine and I usually decide based on how deep the snow is. In addition to the tent it is also nice to bring along a small tarp. You can use it as a cooking shelter when it is snowing and I like use it by the door of my tent to keep form tracking in too much snow.
4. Sleeping Bag and Pad – If you plan to do a lot of winter camping you may want to invest in a good 0 degree bag. I usually only get out one time a year so I just double up the bags that I have. I have found that using my 20 degree mummy bag with my lightweight 40 degree summer bag on top gets the job done. Another option is to use a fleece liner to improve the temperature rating of your bag. When layering bags or blankets you want to have the heaviest layer on the bottom so that it does not compress the loft of your other layer and take away the insulating properties. In cold weather mummy bags are almost a must because they 
An insulating sleeping pad is probably just as important as your bag for keeping you warm and comfortable during the night. Since I am not worried about weight, I double up here too. Even with 2 pads I often can feel the cold starting to come up from the ground by morning. My first pad is a Therm-A-Rest Z-Lite
. This lightweight closed cell foam pad with an egg carton texture is comfortable by itself and is my go to pad for backpacking trips. It was also recently updated with an aluminized surface that reflects more heat. On top of this pad I have one of the standard Therm-A-Rest
self inflating pads. I like knowing if I get a hole in the inflatable pad I still have the foam pad for insulation.
5. Hand Warmer Packs – One thing that really helps you stay warm when the temperatures drop are the air activated hand and foot warmer packs. I am partial to the Grabber brand warmers
because they are based right in West Michigan. These little packs give off a surprising amount of heat and will last from 6 to 8 hours. On cold nights I put one of these in the bottom of my sleeping bag and another in one of my pockets. I have read that filling a Nalgene bottle with boiling water and then putting this inside your bag is another way to stay warmer at night. I have not tried this method, although from what I have heard, it does not last long enough and it can make things damp so I just stick with the warmer packs.
6. Footwear – For winter hiking I like to wear my uninsulated backpacking boots with a single pair of SmartWool Heavy Hiking Socks. I have found that layering socks does not seem to work well for me. My feet stay warmer with just a single pair of good wool socks. I think when you layer it tends to hurt the circulation to your toes and they get cold faster. Cold feet are the worst, so avoid cotton and spend the money on a couple good pairs of merino wool socks. The wool dries fast, naturally fights odor and still insulates fairly well even when wet.
For around camp at night I pack in a pair of LaCrosse Ice King hunting boots. These boots are expensive, but I have

. 1 of these pairs is kept dry and reserved just for sleeping. Another trick that I recently discovered is to remove the liners from my LaCrosse Boots and I wear them inside my sleeping bag. I am fairly tall and my feet hang off the end of the sleeping pad and are up against the tent wall when I stretch out. My feet always seemed to get cold until I started doing this.
One thing that can ruin your day is accidentally flipping the snow up off the back of your snowshoe and into the back of your boots. To keep this from happening I always wear Outdoor Research Gaiters. They help keep your pants dry in deep snow and keep it out of your boots.
7. Base Layer – When you are outside and being active in the winter a good base layer is the most import thing for keeping you comfortable. You will want something that fits close to your skin made from either a synthetic or wool materials that will dry fast and wick away moisture. Avoid cotton because it holds the moisture and does not insulate well when wet. I use a SmartWool Long Sleeve Shirt paired with Patagonia Capilene Mid Weight Bottoms. The SmartWool Shirt was a gift and is a new favorite of mine. It dries fast and because it is made from wool it can be worn a few days in a row and still stay fairly fresh. I usually take a second base layer in case I need something dry to sleep in. . I suppose that you could “go commando” under your base layer, but I choose the quick drying and odor resistant ExOfficio Give-N-Go Boxers
. If someday I win the lottery I will get some of these for everyday of the week.

visor to help keep the snow out. I have an old Columbia
jacket that I bought for skiing back in high school that I still really like. I would advise spending the money to get something good and keep it forever. Along with my shell I take a mid weight fleece coat, light weight fleece shirt and a soft shell vest. All of this gives me several layering options that I can customize for any weather. I find that most of the time for hiking I wear my North Face Lightweight 1/4 Zip Fleece and Soft Shell Vest,
unless it is snowing or windy. I try to setup my layers so that I am starting a little cold for the first 5 to 10 minutes of the hike. Then when I stop I try to add a layer before getting too cold again.
9. Pants – Like most things I also take 3 pairs of pants. I mainly wear my North Face Convertible Hiking Pants. Wearing my gaiters keeps the bottom of my pant legs dry and this works good unless wet snow is falling. Sitting around the fire at night I pull an old pair of ski pants for extra warmth and water resistance. Then my backup pants are just some lightweight athletic wind pants.
10. Hats and Gloves – For hiking I have a thin fleece beanie that is just enough to keep my ears warm, but breaths really well. Then I pack another thicker knit hat for at night. Gloves are another thing that I use the rule of 3 on. I have thin fleece gloves that I wear for hiking, setting up camp and cooking. Then I take a set of ski gloves for colder weather and doing things like cutting fire wood when my hands are in the snow. For really cold weather I just bought some Outdoor Research 3-Finger Gloves that I really like. These gloves have the best design and the most features of any gloves that I have ever owned. They come with removable liners that have hand warmers pockets. Both the wrist and cuff adjustments are easy to use even with both gloves on. I also really like the wrist lanyards for when you quick take them off to do something. This is also a nice feature to keep you from dropping them off a chairlift. I chose to go with the 3-finger version because I also wanted to use them for riding my fat tire bike in the winter. If you do not have a reason for lobster claw type glove I would go with some of the Outdoor Research Mittens.

11. Water and Food – In cold weather it is still important to drink a lot of water. It is hard to gauge how much fluid you are losing because it evaporates fast in the cool dry air. When you get dehydrated it is also harder for your body to keep itself warm. Most of the time we have to melt snow for water. Leave your water filter at home because the filter will freeze up and may even crack. Fresh snow is supposed to be okay to drink, but I usually bring it up to a boil just to be safe. If you are by a lake or river where you can safely get to open water this will save you time and fuel compared to melting snow. You also 
I use the MSR Pocket Rocket Stove for boiling water and cooking. Backpacking stoves like this that use the canister fuel do not work as well when temperatures get down into the mid teens. The first few times that I used my stove in cold weather it worked fine, but then I had a really cold night where it was only at about 20% with the valve all the way open. Now I warm the fuel canister in my coat before I use it and have not had a problem.
You will find that being out in the cold all day makes you really hungry because of all the extra calories you burn just to stay warm. Another good thing about winter camping is that you do not have to worry about your food spoiling. I probably should take advantage of this more, but usually just keep things pretty simple. For breakfast I usually just have oatmeal or granola bars and a couple handfuls of trail mix. It is also nice to warm up with a cup or two of Starbucks Ready Brew Coffee. Make sure to pack an insulated coffee cup with a lid to keep warm while you drink it.

Lunch is usually just a sandwich or wrap. For dinner in the winter I like to have a can, or sometimes 2, of a hearty soup or stew. I stay with keep it simple strategy by heating it up right in the can on my stove or in the fire. I like doing it this way because my pot stays clean and the only thing I have to clean up is a spoon. Before doing this make sure the can dose not have a plastic lining. Also it is best to stay away from cream based soups. One time I tried a creamy clam chowder and it started burning on the bottom of the can while the top was still cool. That meal of barely warm chowder with extra mesquite flavor was a little disappointing. It is also a good idea to eat a little something right before going to bed. The extra calories will help you stay warm during the night. Go ahead and treat yourself at night with something like a calorie rich candy bar, you have earned it.
I have camped in the winter with guys who have even packed in a cast iron dutch oven in their sled, so your food options can really be endless. I must admit that the dutch oven pineapple cake for desert and the western scramble for breakfast was really good. Although, I still do not think I will be dragging in all this extra weight.
12. Miscellaneous – The rest of it

– It is nice to have something to sit on by that campfire that keeps you dry and gives some back support.
– Folding Camp Saw – A big pile of fire wood makes for a good night. My 8 inch folding saw does good cutting branches up to about 4 inches in diameter. Some of the guys use a standard hand saw since the extra weight is not an issue. Don’t forget a lighter and some matches.
– Headlamp
– It gets dark early in the winter so a headlamp and a small backup flashlight are good to have. I really like my Princeton Tec Remix Headlamp for winter camping because it has a big button that is easy to use with gloves.
– Cook set, Spoon, Fork
and Can Opener
– All the tools for eating.
– Multi-Tool – Winter is about the only time that take out my Leatheman. I usually decided that it is too heavy for other trips.
– Rope, Zip Ties and Duct Tape – I still like to hang my food in the winter. Bears should be hibernating so it just has to be high enough to be out of reach of raccoons and squirrels. Zip ties and duct tape are good for fixing almost anything.
Other than a few toiletries, my camera and cell phone I think that is everything that I take for a night of cold weather camping.
If sleeping in a tent in the cold doesn’t sound like your thing many of the Michigan State Parks keep their mini and camper cabins open year round. The cabins in Wilderness State Park by Mackinaw City are also open in the winter for hike or ski in access. These rustic cabins have wood burners for heat and the DNR stocks the wood pile for you. We have not done this yet, but it is on our list. For more information on the winter cabin options see Michigan State Park Cabin Page >>
For ideas of where to go winter camping in Michigan click here. Since it is often hard to do a lot of miles in the snow we usually look for a place to camp that is a only a couple miles into the woods. Then we like to setup our base camp and explore further from there.
Our Favorites:

If you have never treated your feet to the awesomeness of Smartwool Socks you are missing out. We have several different weights and wear them year round. The high quality Merino wool is soft and itch free. They wick moisture well and are naturally anti-bacterial so you can wear them several days in a row before they need to be washed. Merino also does a fairly good job of insulating even when wet which is a big benefit for cold weather activities. Pick some up, it will the best 20 bucks you have ever spent on your feet.
FindSmartwool Socks on Amazon >>
Advertising Disclosure: We may receive a commission if you click a link on our site and purchase one of the products or services that we recommend.