7. Base Layer - When you are outside and being active in the winter a good base layer is the most import thing for keeping you comfortable. You will want something that fits close to your skin made from either a synthetic or wool material that will dry fast and wick away moisture. Avoid cotton because it holds the moisture and does not insulate well when wet. I use a SmartWool Long Sleeve Shirt paired with Patagonia Capilene Midweight Bottoms. The SmartWool Shirt was a gift and is a new favorite of mine. It dries fast and because it is made from wool it can be worn a few days in a row and still stay fairly fresh. I always make sure to also take a second base layer that I keep dry and reseved for just at night. I supose that you could "go commando" under your base layer, but I choose the quick drying and odor resistent ExOfficio Give-N-Go Boxers paired with Patagonia Capilene Midweight Bottoms. The SmartWool Shirt was a gift and is a new favorite of mine. It dries fast and because it is made from wool it can be worn a few days in a row and still stay fairly fresh. I always make sure to also take a second base layer that I keep dry and reseved for just at night. I supose that you could "go commando" under your base layer, but I choose the quick drying and odor resistent ExOfficio Give-N-Go Boxers . If someday I win the lottery I will get some of these for everyday of the week. . If someday I win the lottery I will get some of these for everyday of the week.
 8. Coats - A water proof and breathable shell is a must for winter camping. If you do not already have one look for something with a big hood with a built in 8. Coats - A water proof and breathable shell is a must for winter camping. If you do not already have one look for something with a big hood with a built in visor to help keep the snow out. I have an old Columbia
jacket that I bought for sking back in high school that I still really like. So I would advise spending the money to get something good and keep it forever. Along with my shell I take a mid wieght fleece coat, light weight fleece shirt and a soft shell vest. All of this gives me several layering options that I can customize for any weather. I find that most of the time for hiking I wear my North Face Lightwieght 1/4 Zip Fleece and Soft Shell Vest
unless it is snowing or windy. I try to setup my layers so that I am starting a little cold for the first 5 to 10 minutes of the hike. Then when I stop I try to add a layer before getting too cold again.
visor to help keep the snow out. I have an old Columbia
jacket that I bought for sking back in high school that I still really like. So I would advise spending the money to get something good and keep it forever. Along with my shell I take a mid wieght fleece coat, light weight fleece shirt and a soft shell vest. All of this gives me several layering options that I can customize for any weather. I find that most of the time for hiking I wear my North Face Lightwieght 1/4 Zip Fleece and Soft Shell Vest
unless it is snowing or windy. I try to setup my layers so that I am starting a little cold for the first 5 to 10 minutes of the hike. Then when I stop I try to add a layer before getting too cold again.
9. Pants - Like most things I also take 3 pairs of pants. I mainly wear my North Face Convertable Hiking Pants. Wearing my gaiters keeps the bottom of my pants legs dry and this works good unless wet snow is falling. Sitting around the fire at night I pull an old pair of ski pants for extra warmth and water resistance. Then my backup pants are just some athletic wind pants.
  10. Hats and Gloves - For hiking I have a thin fleece beanie that is just enough to keep my ears warm, but breaths really well. Then I pack another thicker knit hat for a night. Gloves are another thing that I use the rule of 3. i have thin fleece gloves that I wear for hiking, setting up camp and cooking. Then I take a set of ski gloves for colder weatther and doing things like cutting fire wood when my hands are in the snow. For really cold weather I just bought some Outdoor Research 3-Finger Gloves that I really like. These gloves have the best the design and the most features of any gloves that I have ever owned. They have removable liners with hand wamers pockets. Both the wist and cuff adjustments are easy to use with both gloves on. I also really like the wrist lanyards for when you quick take them off to do something. This is also a nice feature to keep you from dropping them off a chairlift. I chose to go with the 3-finger verison becasue I also wanted to use them for riding my fat tire bike in the winter. If you do not have a reason for lobster claw type glove I would go with some of the Outdoor Research Mittens.
11. Water and Food - In cold weather it is still important to drink a lot of water. It is hard to gauge when much fluid you are losing becasue it evaporates fast in the cool dry air. When you get dehydrated it is also harder for your body to keep itsellf warm. Most of the time we have to melt snow for water. Leave your water filter at home because the fliter will freeze up and may even crack. Fresh snow is susposed to be okay to drink, but I usually bring it up to a boil just to be safe. If you are by a lake or river where you can safely get to open water this will save you time and fuel compared to melting snow. You also  want to bring this water up to a boil for at least 2 minutes. If there is not fresh snow on the ground you may want to pour it though a coffee filter to get outdebris that may have fallen from the trees. want to bring this water up to a boil for at least 2 minutes. If there is not fresh snow on the ground you may want to pour it though a coffee filter to get outdebris that may have fallen from the trees.
I use the MSR Pocket Rocket Stove for boiling water and cooking. Backpacking stoves like this that use the canister fuel do not work as well when temperatures get down into the mid teens. The first few times that I used my stove in cold weather it worked fine, but then I had a really cold night where it was only at about 20% with the valve all the way open. Since then I started warming the fuel canister in my coat before I use it and have not had another problem.
  You will find that being out in the cold all day makes you really hungery becasue of all the extra calories you burn just to stay warm. Another good thing about winter camping is that you do not have to worry about food spoiling. I probably should take advantage of this more, but usually just keep things pretty simple. For breakfast I usually just have oatmeal or ganonla bars and a couple handfuls of trail mix. With this I like to warm up with a cup or two of Starbucks Ready Brew Coffee. Make sure to pack an insulated coffee cup with a lid to keep warm while you drink it.
Lunch is usally just a sandwich or wrap. For dinner in the winter I like to have a can, or sometimes 2, of a hearty soup or stew. I stay with keep it simple strategy by heating it up right in the can on my stove or in the fire. I like doing it this way becasue my pot stays clean and the only thing I have to clean up is a spoon. Before doing this make sure the can dose not have a plastic lining. Also it is best to stay away from cream based soups. One time I tried a creamy clam chowder and it started burning on the bottom of the can while the top was still cool. That meal of barely warm chowder with extra mesquite flavor was a little disappointing. It is also a good idea to eat a little something right before going to bed. The extra calories will help you stay warm during the night. Go ahead and treat yourself with something like a calorie rich candy bar, you have earned it.
I have camped in the winter with guys who have even packed in a cast iron dutch oven in their sled, so the food options are really endless. I must admit that the pineappple cake for desert and the western scramble for breakfast was really good. Although, still I do not think I will be dragging in all this extra weight.
12. Miscelanous - |


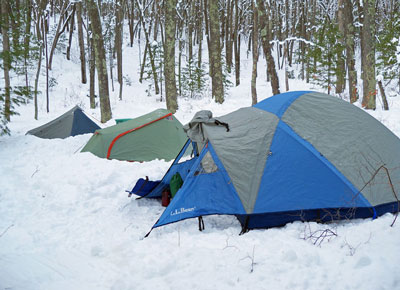 heavy duty rain fly with almost full coverage. This was the tent that we used for kayak camping before we had kids and it is much heavier than my single wall backpacking tent and takes a little longe to setup. I like to have the tent and rain fly combination because it is actually surprising how much heat stays trapped inside the double wall tent. I can keep my water bottle next to me outside of the sleeping bag and it usually will not freeze even in temperatures down to the single digits. However, I think you would be fine in a lightweight backpacking tent except for in really heavy and wet snow. One of the guys uses only his rain fly and ground cloth and then builds a wall of snow around the outside and he has been fine.


